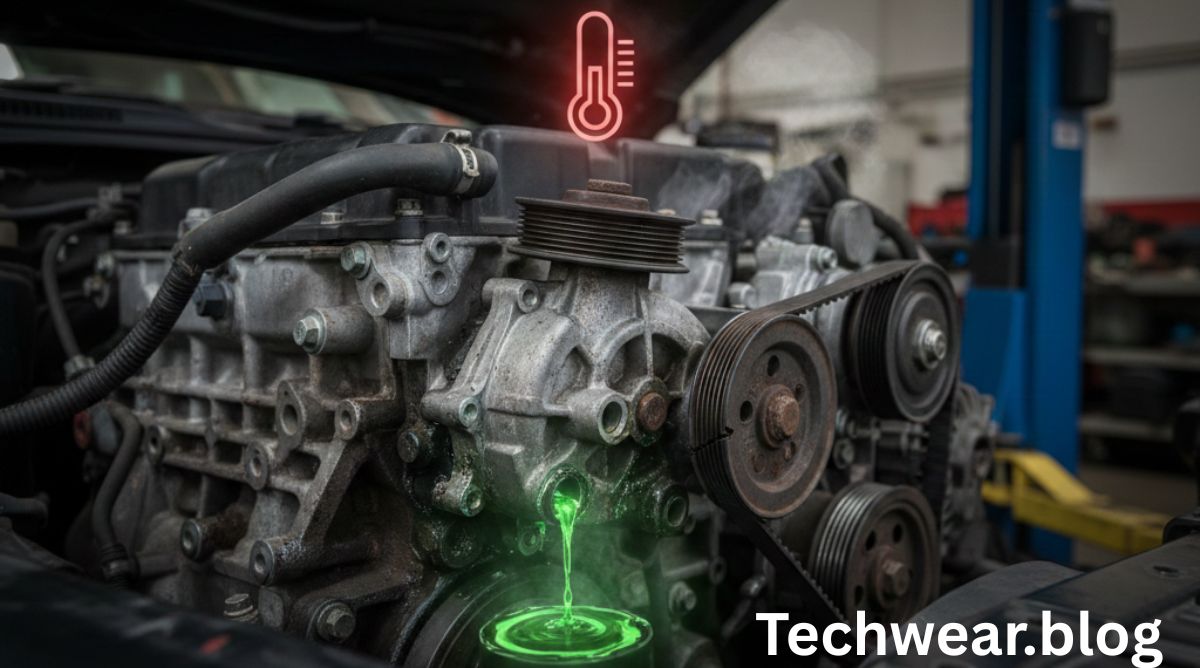
Keeping your car’s engine at the right temperature is essential for performance, longevity, and safety. One of the most important parts of maintaining this balance is regularly checking your coolant level. The coolant (also known as antifreeze) keeps your engine from overheating in summer and from freezing in winter. If the level drops too low, it can cause serious damage such as overheating, warped cylinder heads, or even complete engine failure.
In this detailed guide, we’ll explain how to check the coolant level in a car, why it’s important, what type of coolant your vehicle needs, common mistakes to avoid, and when to top up or flush the system.
Understanding what coolant does
Before learning the steps to check it, it’s important to understand what coolant actually does.
Coolant, or antifreeze, is a liquid mixture (usually a 50/50 blend of ethylene glycol or propylene glycol and water) that circulates through your engine and radiator. Its purpose is to:
- Absorb and dissipate heat generated by the engine during combustion.
- Prevent freezing of engine fluids during cold weather.
- Protect engine metals and seals from corrosion.
- Maintain consistent temperature for efficient combustion and fuel economy.
The cooling system works in a loop. The coolant absorbs heat from the engine block, passes through the radiator where air flow cools it down, and then returns to the engine.
Over time, coolant can evaporate, leak, or become contaminated. That’s why routine checks and maintenance are necessary to keep your engine safe.
Why checking the coolant level is important
Checking the coolant isn’t just a formality—it’s an essential part of car care. Neglecting it can lead to costly repairs.
Here’s why it matters:
- Prevents engine overheating: When coolant is too low, your engine cannot regulate temperature properly, leading to overheating.
- Avoids freezing damage: In freezing climates, insufficient antifreeze can cause the coolant to solidify, damaging the radiator, hoses, and engine block.
- Protects against corrosion: Old or contaminated coolant loses its anti-corrosive properties, allowing rust to form in the cooling system.
- Ensures heater efficiency: The cabin heater relies on hot coolant; if it’s low, your car may blow cold air in winter.
When should you check the coolant level?
It’s recommended to check the coolant level every couple of weeks or before long drives. However, the following situations warrant an immediate inspection:
- The temperature gauge shows the engine is running hotter than usual.
- You see coolant leaks or puddles under your car.
- Your heater is not blowing warm air.
- A “Low Coolant” or “Check Engine” warning appears on your dashboard.
Always check coolant when the engine is cold to avoid burns or pressure-related injuries.
Step-by-step: How to check the coolant level in a car
Checking the coolant level is a simple process that doesn’t require special tools. Here’s a complete step-by-step guide:
1. Park and let the engine cool down
Before touching anything, turn off your car and let the engine cool for at least 30 minutes. This prevents burns from hot coolant and ensures accurate readings. Never remove the radiator cap from a hot engine — pressure can cause boiling coolant to spray out.
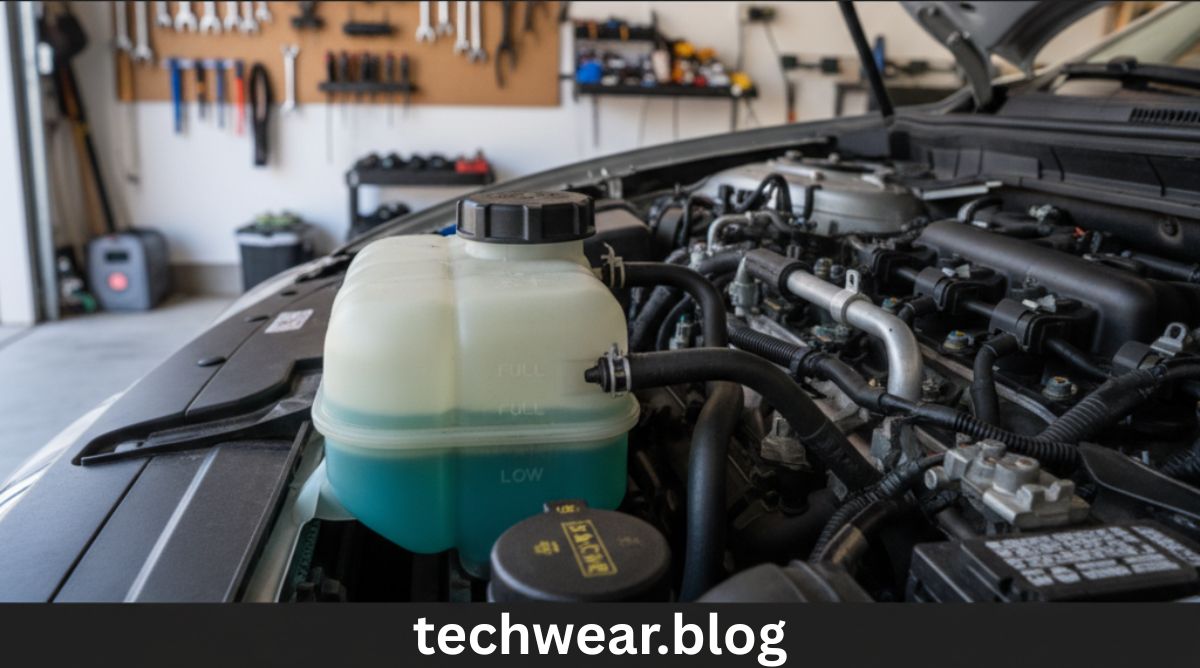
2. Locate the coolant reservoir
Open the hood and locate the coolant reservoir (also called the expansion tank or overflow tank). It’s usually a translucent plastic container connected to the radiator by a hose.
Look for labels like “Engine Coolant”, “Antifreeze”, or markings for “MIN” and “MAX”. Most reservoirs have these level marks molded on the side.
3. Inspect the coolant level visually
Without removing any caps, check the level by looking at the markings on the side of the reservoir. The coolant should sit between the “MIN” and “MAX” lines.
- If it’s at or above MIN, your level is safe.
- If it’s below MIN, you need to top it up.
- If you cannot see the level clearly, gently shake the reservoir or use a flashlight to make it more visible.
4. Check the coolant color and condition
Healthy coolant is usually bright green, yellow, orange, pink, or blue, depending on the type. If the color looks rusty, brown, or cloudy, it’s likely contaminated and needs to be replaced.
Also, check for oil-like residue — that could indicate a serious issue like a head gasket leak.
5. Open the reservoir cap (only if cold)
If the coolant needs topping up, carefully unscrew the reservoir cap. Turn it slowly in case there’s residual pressure.
If your car doesn’t have a separate reservoir and only a radiator cap, make sure the engine is completely cool before removing the radiator cap itself.
6. Add the correct coolant mixture
Add a 50/50 mixture of antifreeze and distilled water unless your coolant container says “pre-mixed.” Pour slowly until the level reaches the MAX mark.
Never overfill — coolant expands when hot, and overfilling can cause leaks.
Tip: Use a funnel for precision and avoid spilling coolant on engine parts or belts.
7. Recheck after running the engine
After topping up, close the cap securely and run the engine for a few minutes with the heater on high. Then let it cool again and recheck the level — sometimes the level drops slightly as air pockets are purged.
If it keeps dropping, check for leaks under the car or around hoses and the radiator.
Different types of coolant
There’s no one-size-fits-all coolant. Using the wrong one can cause corrosion or reduced cooling performance.
Common types include:
- IAT (Inorganic Additive Technology): Usually green, used in older cars (before mid-1990s).
- OAT (Organic Acid Technology): Often orange, pink, or dark red; lasts longer, common in newer cars.
- HOAT (Hybrid Organic Acid Technology): Usually yellow or turquoise; a mix of the above, used in many European and Chrysler vehicles.
Check your owner’s manual or radiator cap to confirm which coolant type your car needs. Mixing types can cause chemical reactions that reduce effectiveness.
Common mistakes when checking or topping coolant
Even though it’s a simple task, there are common mistakes that can cause big problems:
- Opening the cap when hot: This can cause boiling coolant to spray out — always wait for the engine to cool.
- Using tap water: Tap water contains minerals that can corrode your cooling system. Always use distilled water.
- Mixing different coolant types: This can cause sludge formation and reduce heat transfer.
- Ignoring leaks: If you’re frequently adding coolant, you probably have a leak — get it checked.
- Overfilling: Excess coolant can overflow and create pressure issues.
How to detect coolant leaks
If you notice your coolant level dropping repeatedly, check for visible signs of leakage:
- Puddles of green, pink, or orange fluid under the car.
- White smoke from the exhaust (possible internal leak).
- Sweet smell near the hood (antifreeze odor).
- Steam or overheating gauge rising during driving.
Common leak points include radiator hoses, water pump seals, the radiator itself, or even the heater core.
If you suspect an internal leak (e.g., coolant mixing with oil), have your vehicle inspected by a professional immediately.
When to replace the coolant completely
Topping off the coolant works for minor adjustments, but over time the fluid breaks down and loses protection.
Most manufacturers recommend replacing coolant every 2–5 years or 30,000–60,000 miles, depending on the vehicle and coolant type.
Signs it’s time for a full flush:
- Coolant looks rusty or brown.
- Sludge or sediment visible in the reservoir.
- Overheating issues despite proper levels.
- You don’t remember the last time it was changed.
A complete coolant flush removes old fluid, contaminants, and air pockets, ensuring optimal performance and corrosion resistance.
Checking coolant in different car types
1. Gasoline vehicles
Follow the standard steps above. Gasoline engines typically have simpler cooling systems and accessible reservoirs.
2. Diesel engines
Diesel vehicles generate more heat and may have additional coolers. Coolant should always be checked cold, and topping up might require specific heavy-duty formulations.
3. Hybrid and electric cars
Modern electric and hybrid vehicles also use coolant for battery thermal management. These systems are delicate, and the coolant must meet strict OEM specifications. For electric cars, it’s best to let trained technicians handle coolant service.
Environmental and safety tips
- Dispose of used coolant responsibly. Coolant is toxic to pets and wildlife. Never pour it down drains or onto the ground. Take it to a recycling center or auto shop.
- Store securely. Keep coolant bottles tightly sealed and away from children.
- Wear gloves and safety glasses. Avoid direct skin contact or ingestion — antifreeze can be harmful.
Summary: Keeping your coolant system healthy
Checking the coolant level in a car is a simple but essential maintenance task. It ensures the engine stays at an optimal temperature, prevents breakdowns, and extends your car’s lifespan.
To recap:
- Always check when the engine is cold.
- The coolant level should be between the MIN and MAX lines.
- Use the correct type of coolant (IAT, OAT, or HOAT).
- Top up only with a proper 50/50 antifreeze–water mix.
- Replace coolant entirely every few years or as recommended.
By following these steps and inspecting regularly, you can avoid costly repairs, maintain smooth performance, and keep your engine cool — no matter the season.